I don't know about Capture One, but in LR/ACR getting halos when darkening selections like skies is definitely an issue--especially with the Auto Masked adjustment brush. But that's true for any commonly used edge-bounded method that I've tried, including Photoshop's selection tools such as Magic Wand or Color Range. I've been checking out other techniques to get around those limitations.
The problem is made harder though in the example presented to us by Redcrown because of the nature of the image file. The image is a little too overexposed for easy post processing to a good blue sky. The white flowers are blown out. I would have preferred an exposure about 1 stop less to allow for easier sky recovery. Also, in the original file presented to us, the custom WB has added a yellowish cast, greatly warming the sky and rendering it less blue—making the job of recovering the blue color much more difficult. Those factors force us to make radical adjustments to recover the sky, which accentuate any artifacts.
Lots of you have taken a shot at processing Redcrown's file, and it has been fun and informative to read through. Let me add some remarks about my own attempt, which I think was successful. I stuck with LR4.4 and PS CS6, since that's what most of us use.
I processed first through LR, beginning by resetting Redcrown's dng file adjustments back to default. That included setting the WB to "As Shot", which removes the yellow cast and gives us a good start on that blue sky. Then I optimized various other settings to get the whole image looking as good as possible (to me), without pushing any parameter so far as to cause artifacts. I think the resulting image from LR looks fine, with no halos that will be noticeable in a moderately sized print.
But to get the sky a little darker yet, I took it into CS6 and used a couple of luminosity and gradient masks, together with Levels adjustments, to modestly darken just the brightest tones (sky) in the upper part of the frame. A major advantage of luminosity masks is their ability to automatically feather between contrasting objects in a smooth, natural way. If you don't know about luminosity masks, do a search for them to get to Tony Kuyper's tutorials. He a master of luminosity masking.
Attachments showing the full images are at the bottom of this post, and I would suggest looking at them first.
The following embedded images are 100% crops of the leaves, which to my eye show no artifacts induced by the processing, but as others have noted there are some specular reflections on the edges of some leaves present even in the unadjusted file.
Redcrown's original DNG
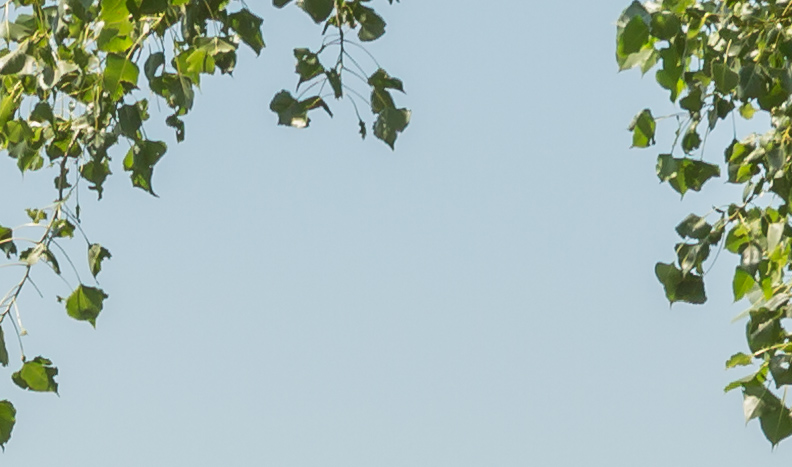
LR4.4
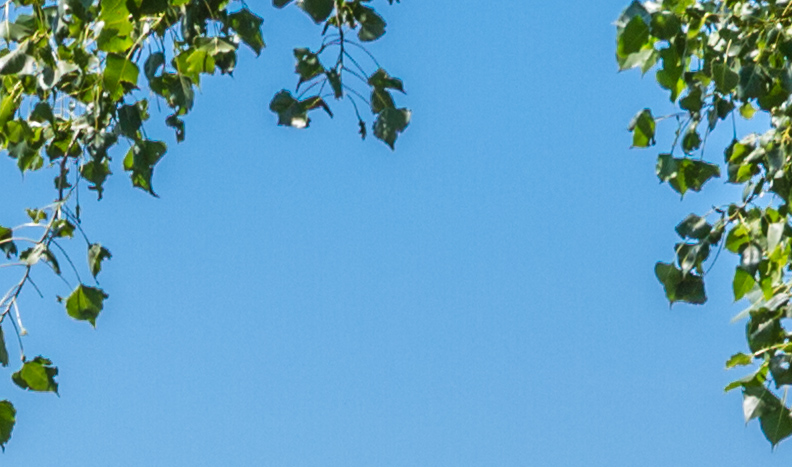
LR4.4 + Luminosity Masking in CS6
 The first attachment below is a jpeg of the full image generated in LR from Redcrown's "original" dng file
, with his settings exactly as I received them. No output sharpening was applied to it or to any of the other attached or embedded images here. Redcrown's file included some capture sharpening, and my versions modified that down to default sharpening settings, which seemed more appropriate to me.
The second attachment is the full image adjusted in LR only, by me.
The third attachment is the full image adjusted in LR plus Luminosity Masking in CS6.
The fourth attachment is a text file describing the steps that were taken in LR and CS6, for anyone interested.
I also have a screen capture of the LR settings that were used, that I can post if requested.
