Sue,
1. Save the print file where ever you can find it easily. You'll be emailing it to the printer or ftping it, right?
2. The Print Job dialog box looks like this:
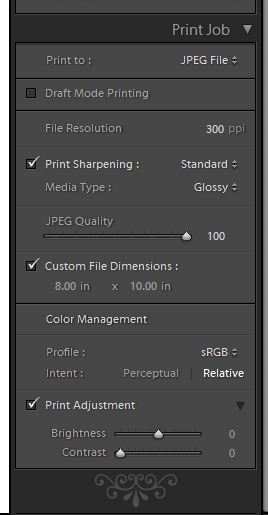
From top to bottom:
a) Pick
JPEG Fileb) Set the file resolution (aka print resolution) to whatever your printer suggests. If they say "dpi" (dots per inch), assume they mean "ppi" (pixels per inch). From what you say, it sounds like 300 is the right number.
c) Set print sharpening to taste. Try
Standard for openers.
d) It you're having them print on glossy paper, set media type to
Glossy. Otherwise, pick what seems close.
e) Set the
JPEG Quality slider to the highest valuse that gives an acceptable file size.
f) Unless you're playing with the print borders, leave the
Custom File Dimensions box unchecked. Lightroom will respect the image dimensions you set up in the main screen, but will not create any white space around the image. If you do check this box, Lightroom will create an image of the size specified in
Custom File Dimensions, with your image inside it. Try it and see, looking at the jpeg image that LR creates with Photoshop or some handy image editor to verify that. You should check with your printer before specifying custom file dimensions the same size as the paper you're printing on; they may not be able to handle this "full bleed" image.
g) Ask your printer what the
Color Management settings should be. sRGB is safe, but won't allow you to print the full range of colors that your printer can attain.
h) If your prints come back too light, too dark, too flat, or too contrasty, you can mess with the
Print Adjustment controls.
4) See b) above.
5) See f) above.
Does that help? Don't forget to look at the images before you send them off to the printer.
Jim
