Pages: 1 [2]   Go Down

Author Topic: RRS Panoramic equipment  (Read 19773 times)

amplexis

  • Newbie
  • *
  • Offline Offline
  • Posts: 22
RRS Panoramic equipment
« Reply #20 on: April 15, 2007, 06:21:46 pm »

Alan, your suggestions are really helpful to me. a tubular U shaped yoke is what i'm inclined to. and i'm keeping an eye on  small rotary tables on ebay.
again, my gratitude
vincent
Logged

Don Libby

  • Sr. Member
  • ****
  • Offline Offline
  • Posts: 824
  • Iron Creek Photography
    • Iron Creek Photography
RRS Panoramic equipment
« Reply #21 on: April 15, 2007, 09:27:14 pm »

I've done a lot of multiple row/columns panos with both my 1Ds Mk II as well as a Mamiya ADF II.  I have been using the RRS ultimate omni-pivot package with great results.  I lock the omni-pivot to RRS PCL-1 panning clamp.

The tripod must be dead-on level then the camera but be level - two seperate operations.  You also need to the noal point for the lens you're using.  All camera functions must be on manual and no filter used.  Once I have the desired setup I don't touch the camera, instead I use an electronic shutter release and the large knob on the panning clamp to turn the camera.  

Remember to shoot left to right.  So far the largest pano I've done to date is 3 rows by 8 colums overlapping about 50-60% of Horseshoe Bend in Page AZ.  Be prepared for a huge file!  But then again that's why I have 8gig of RAM!

naisan

  • Newbie
  • *
  • Offline Offline
  • Posts: 25
RRS Panoramic equipment
« Reply #22 on: April 16, 2007, 12:07:08 am »

Quote
Thanks for your "heretical" comments with great context to support them, we need more of this kind.

Many like their wide angle (or pano) landscape images to include some prominent foreground objects to emphasize scale and distance.  My understanding is that pano heads can help stitching this kind of shots. Do you happen to have more such examples to demo no pano heads are needed?

As an aside, there are quite a few tutorials on how to build you own pano heads.
[{POST_SNAPBACK}][/a]

The very fact that you're asking for another shot above means that I didn't need a pano head ;-)

I know I could have done better on the example image, shooting the ground right in front of me, but because even with 8 GB of RAM loading a 3GB photoshop image takes a while, I was lazy. But here you are:

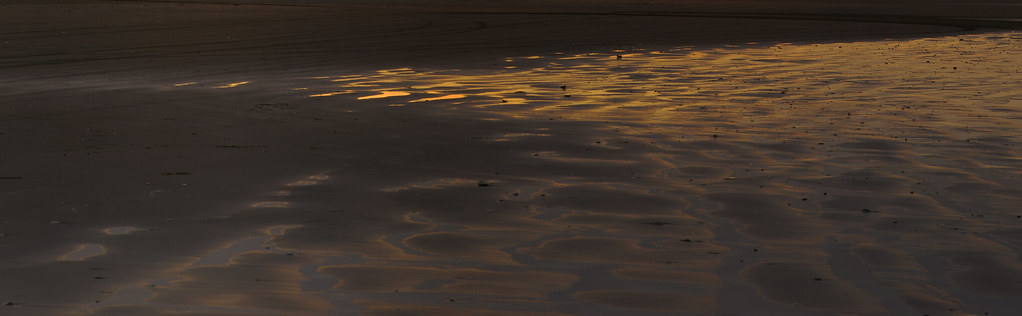
This is a crop of an image (jpg transfer is pretty dark from ProPhoto RGB unfortunately) where I used a nikon d200 with a 50 1.4 shooting the ground about 4 feet in front of me from 56" high or so, with a regular ballhead. This represents about 4 frames, downsized, out of a 2-row 16 frame each with about 1/3 overlap (low light low detail shots are harder to stitch some times) between shots and rows.


I realize that it is hard to tell, but in my original post there are two tall grass reeds which were 3 feet from me. They are blurry.

In the original posts' shots they are present in about 8 frames. Each frame has them in a different place, because I was not using an "omni-pivot" type of panoramic head, so the camera was rotating about the film plane (i.e. the L-bracket was clamped into a regular ballhead) rather than the nodal point (or entrance pupil for the engineer types ;-) ).

If you use regular PTGui stitching, or any other type (i.e. have looked at photoshop etc. . ) you will end up with the lower part of those grass reeds all disjointed and indeed many copies of them side by side in an obvious kind of parallax effect. For an example, see this page ( [a href=\"http://smartblend.panotools.info/]SmartBlend[/url].

The reeds will look like that pen, if not worse because this is a multi-row, so the bottom reeds will actually be detached from the second row, etc. .

Now, the smartBlend plug-in decides where to put the seams to eliminate that kind of effect, obviating the need, in MOST cases, for the $1000 pano head.

However, if you get very serious, and need to sell, or print very large, go ahead and invest in RRS, as it will require the software to do less work, and by extension you to do less work, and by extension, your world will be brighter, happier, and so on.

The very fact that you're asking for another shot means that I didn't need a pano head ;-)

But don't believe me - the software is free to download and try, and may take a little bit of effort to learn, but you can take shots enough in your own house to convince yourself of how it will work for you or not.

Please enjoy!
Logged

Monito

  • Jr. Member
  • **
  • Offline Offline
  • Posts: 97
    • MonitoPhoto
RRS Panoramic equipment
« Reply #23 on: April 16, 2007, 12:42:35 am »

Quote
Remember to shoot left to right. [a href=\"index.php?act=findpost&pid=112596\"][{POST_SNAPBACK}][/a]
Why left to right?  Does it matter which direction or which order, if there is no movement like cloud movement?  How about a multi-row pano?  Do you do left to right then zig back to the left and do the second row left to right or do you jog up or down (as the case may be) and do the second row right to left?
Logged

naisan

  • Newbie
  • *
  • Offline Offline
  • Posts: 25
RRS Panoramic equipment
« Reply #24 on: April 16, 2007, 01:19:50 am »

Quote
Why left to right?  Does it matter which direction or which order, if there is no movement like cloud movement?  How about a multi-row pano?  Do you do left to right then zig back to the left and do the second row left to right or do you jog up or down (as the case may be) and do the second row right to left?
[a href=\"index.php?act=findpost&pid=112613\"][{POST_SNAPBACK}][/a]

In my setup and software usage, left to right has zero bearing on anything. Your choice of how to shoot depends on the situation.

i.e. you have to try to get the edges of the images to match, and hopefully more than the edge in order to get each image to warp efficiently, and then blend efficiently.

So if the clouds are blowing right to left, you will be better off following them and shooting the scene quickly right to left.

If you're at the beach in the wave zone, get the rhythm of the sets, and shoot like mad when the water has drained!

If you're shooting at Dawn or Sunset, shoot with the trend so you're not "swimming upstream" and artificially increasing the color/luminosity gradient. i.e. sunrise shoot the lightest part of the sky first, and sunset shoot the darkest part first, if you want to make it more uniform, and reverse if you want an exaggerated gradient. Keep in mind this also depends on the speed of your shots, which explains why $1000 is a good investment (stability and settling time after adjustments) if you need to shoot a certain light - and who of us doesn't want just that right moment in time?

If there's nothing changing in the 10 minutes you will do your shot, then it really doesn't matter - but you ought to keep to some order just in case there are shots that don't have good identifying features so you can get them positioned well later.

The advice about filters, manual exposure in that post etc. .  IMHO is good for beginners, but is of little use once you're aware of what you're doing.

For instance - if you're shooting a very wide field of view with a polarizing filter, you may have to rotate the filter to get the right hue in the sky at the extremes of right and left, and you must know what you're doing and have a good eye to pull that off.

Or, if you're shooting a vertical of a tree, you will soon learn that you either will end up not only altering the exposure for each shot, but also altering the focus of the lens in order to keep the tree in focus and at a constant level of exposure. The ground is usually dark, and the sky will usually have more light, but you had better keep the tree at some even exposure (i.e. the trunk had better have some decent range of exposure unless you go the HDR route or you will end up with a very dark base and a blown crown).

The golden rule: You have to blend, so adjust so that all the shots have the object of interest in constant 1) focus, 2) exposure 3) etc. .

For beginners, it's easiest to start with a set manual exposure, set focal point (turn autofocus off), and no filters until you get to know what will work for you. Then throw all of that junk out and do what's right to get your shot, just like you learned and un-learned when you first started shooting cameras in the first place ;-)
« Last Edit: April 16, 2007, 01:27:47 am by naisan »
Logged

Chris_T

  • Sr. Member
  • ****
  • Offline Offline
  • Posts: 541
RRS Panoramic equipment
« Reply #25 on: April 16, 2007, 08:18:54 am »

Quote
where are the tutorials on building pano heads? any help would be greatly appreciated.
i am especially interested in building a head with no right angles as this is a great nurturer of vibration. my current approach is a tublar swept arm like on the wimberlys but having it U shaped so there is support on both sides and mounting for the lens on a quick release plate on the bottom of the swinging part. i also am trying to intergrate 120/1 worm gears that i bought on ebay and stops every 5 degrees like on the manfrotto 300N.
is anyone else exploring these things?
thanks,
vincent
[{POST_SNAPBACK}][/a]

Here are some examples of homemade pano heads. They seem flimsy but may be perfectly fine for a point and shoot digicam, or a dslr with a wide angle. Someone with machining tools can create a much sturdier one. These sites also have many great pano tutorials. DISCLAIMER: I have NOT built any of these.

[a href=\"http://www.worth1000.com/tutorial.asp?sid=161123&print=1]http://www.worth1000.com/tutorial.asp?sid=161123&print=1[/url]

http://www.bryanhansel.com/grandmarais/index.php?p=128

http://www.dffe.at/panohead/index-e.html

http://www.tawbaware.com/maxlyons/panhead_d60.htm

Here's one on nodal point:

http://www.kaidan.com/nodalpoint.html
Logged

Chris_T

  • Sr. Member
  • ****
  • Offline Offline
  • Posts: 541
RRS Panoramic equipment
« Reply #26 on: April 16, 2007, 08:39:48 am »

Quote
The very fact that you're asking for another shot above means that I didn't need a pano head ;-)

Thanks for the second example. I did notice the weeds in the first example. They are stitched straight, which means vertical alignment is handled well, but does not demo how horizontal alignment is handled. It is harder to access how well the waves in the second example are stitched in either direction, since I have no reference how they should look like to begin with. For this reason, even if these waves are "off" after stitching, they won't be noticed by a viewer. A much better example is a small hut in the foreground with mountains and fine foliage in the distant background. We can then tell whether the hut's roof/walls are straight, etc. Sorry to sound critical, but that's what I meant in an earlier post that a "set" of such "standardized" images would be critical for comparing different tools.

Quote
But don't believe me - the software is free to download and try, and may take a little bit of effort to learn, but you can take shots enough in your own house to convince yourself of how it will work for you or not.
[a href=\"index.php?act=findpost&pid=112611\"][{POST_SNAPBACK}][/a]

I did spend some time trying PS and Hugin and found them both unsatisfacory for different reasons. Before investing time in yet another tool, I want to have a better handle which one to tackle. Seems like PTGui is the next one on the list.
Logged

Forsh

  • Newbie
  • *
  • Offline Offline
  • Posts: 27
    • http://www.salonandspa.services
RRS Panoramic equipment
« Reply #27 on: April 27, 2007, 08:38:13 pm »


teach in china

This was shot with a 24mm (verticals) 5-shots across/7 deep with a Gitzo tripop and an Arca Swiss Head.
« Last Edit: August 17, 2014, 12:29:56 pm by Forsh »
Logged
Juvederm in Denver
Juvederm in Littleto

stever

  • Sr. Member
  • ****
  • Offline Offline
  • Posts: 1250
RRS Panoramic equipment
« Reply #28 on: April 30, 2007, 01:01:38 pm »

it seems to me the answer for long lenses shooting a matrix, that the Wimberley head is the answer.  you can put a long RRS rail on the lens to get the nodal point (if that's important - i normally don't have enough depth of field to make the nodal point important with a long lens, but i guess if you're really patient you could do a Panorama with Helicon Focus).  

the only thing missing from the Wimberley are horizontal and vertical scales which you should be able to satisfactorily improvise

i don't think you can possibly build something this effective for anything like the price  -- and better yet, Wimberley will loan you one to try for the cost of shipping!
Logged

amplexis

  • Newbie
  • *
  • Offline Offline
  • Posts: 22
RRS Panoramic equipment
« Reply #29 on: April 30, 2007, 01:40:47 pm »

i just got a mongoose M3.5 http://www.4gdphoto.com/catalog/index.php?...&products_id=67
and it by far is the nicest smoothest most versatile pano head i have ever used and i've owned several kaidan, nodal ninjas and homegrown rigs.
IT'S 1.4lbs! it had a 2 7/8" distance from the AS plate face to the Y axis so it is perfect for many collared lenses. i put a manfrotto 3001 index head under it and an acratech leveler under that.
4th generation designs say it will support a 500mm f4 or a 300mm 2.8 easily.
i use a RRS MPR-CL rail with a blocked up AS clamp for vertical panos with wider lenses.
the smooth positive lock without shifting is a joy.
vincent
Logged
Pages: 1 [2]   Go Up